
Hello to my Cottage Market friends! It is an honor that Andrea has asked me to visit again today from my blog anderson + grant to share a makeover that I’m hoping you’ll love.
If you spend anytime at all watching Fixer Upper, then you’ve probably seen Joanna Gaines placing some chunky painted candlesticks on a mantel, sofa table, or nightstand. I’m a huge fan of her style (as I’m sure many of you are) and love how these sculptural objects can bring an entire display together. It isn’t even necessary to put a candle on them all the time as they look stylish just standing there all on their own.
As someone always on the lookout for projects I can do myself rather than buy, I set out on a search for wood candle holders to update at local thrift stores. And as is normally the case when I’m looking for something specific with a project in mind, I came up empty handed. While a little disappointed, I was not willing to give up quite yet.
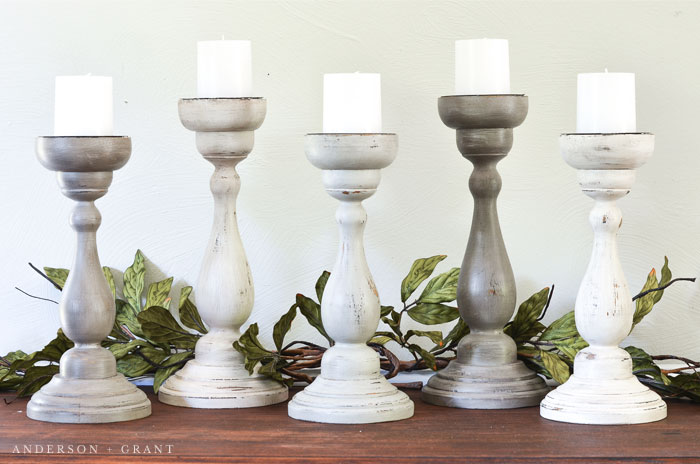
A few weeks after my search began, I found an entire shelf filled with two sizes of chunky wood candlesticks on clearance at Kirklands. And as luck would have it, the clearance merchandise was an additional 25% off that day. I got each one for about $6 a piece. Not too bad when you consider how much these can sell for in the store.
If you are just entering into the world of DIY, one of the biggest lessons you can learn is that your mind should constantly remain open and your eyes looking far and wide because you never know where you might find those treasures to makeover.

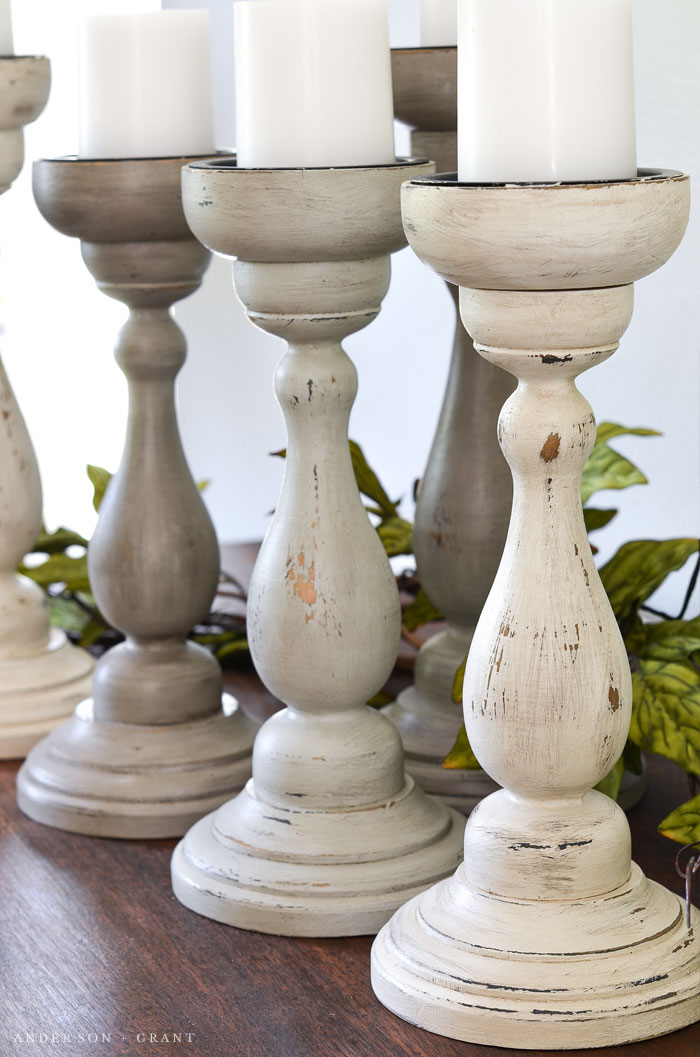
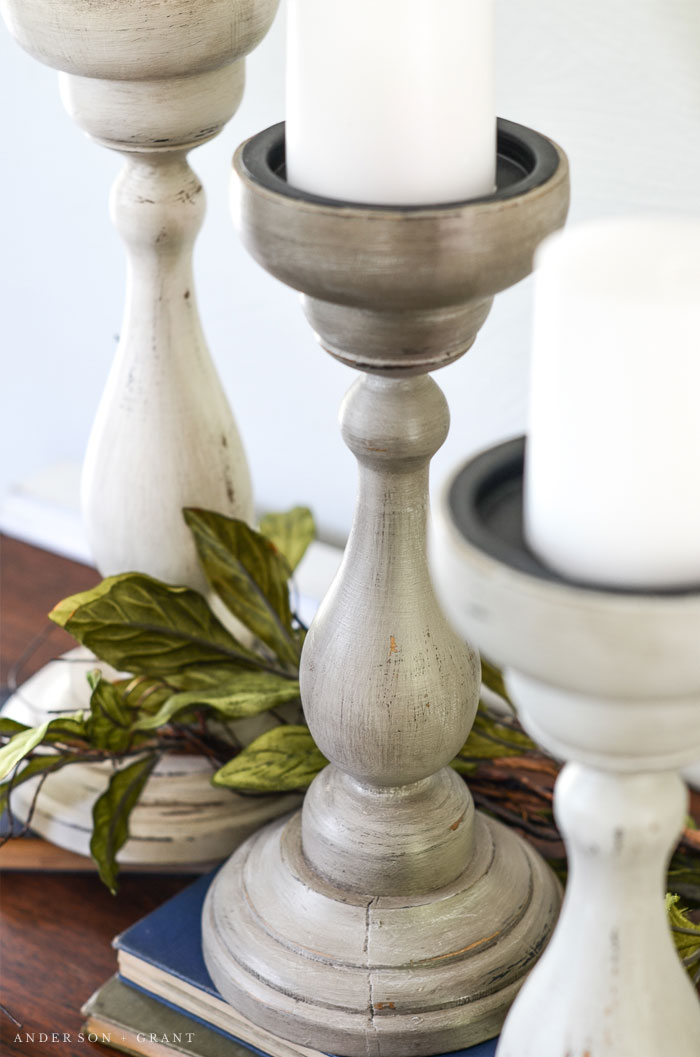
I wasn’t necessarily opposed to the wood look of these candlesticks, but had my mind pretty much set on painting them. The painting process involved layer after layer of paint to obtain that worn, “I’ve been sitting here for years” kind of look. To make the group look a little more collected, the candlesticks are painted in different shades of gray and cream, rather than all the same color.
For this project, all the paints used are from Fusion Mineral Paint, my personal favorite. You can use any of your favorite paints, however, whether they be milk paint, chalk paint, or just latex leftover from a recent room renovation.
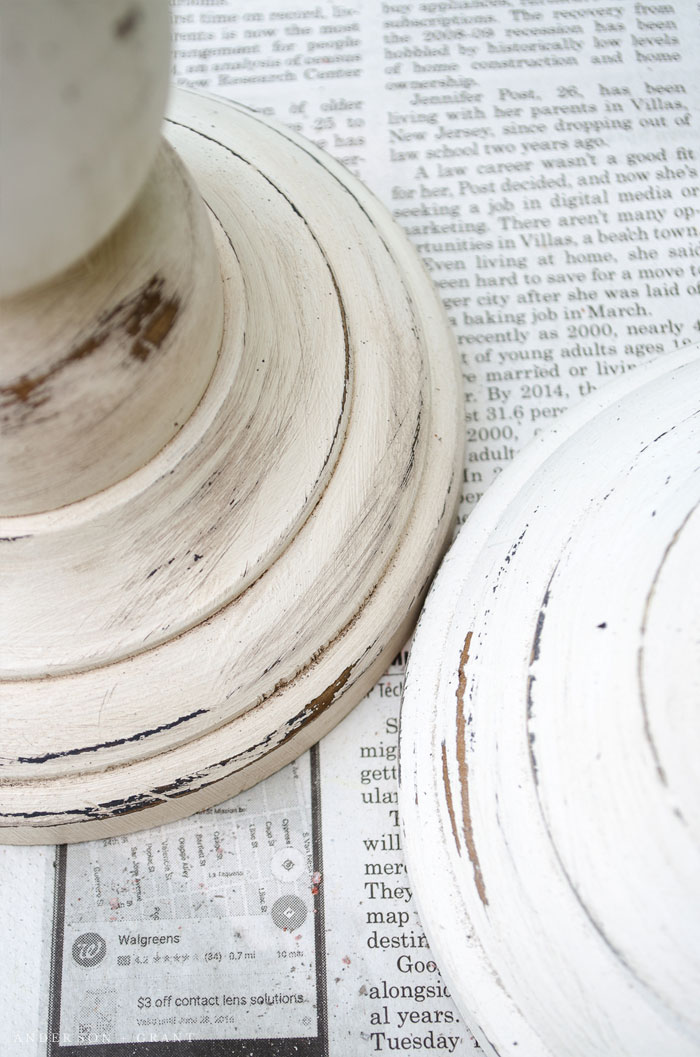
I began by rubbing different areas with a clear candle where I wanted the wood to show through. This allows the paint to chip away easily when you are ready to distress, but protects the surface underneath the wax.
The base coat for all the candlesticks was Ash. It took just one coat of paint. Since there are more layers going on top of this one and the charcoal color is just going to show through the distressed areas, it isn’t necessary to have everything perfectly covered.

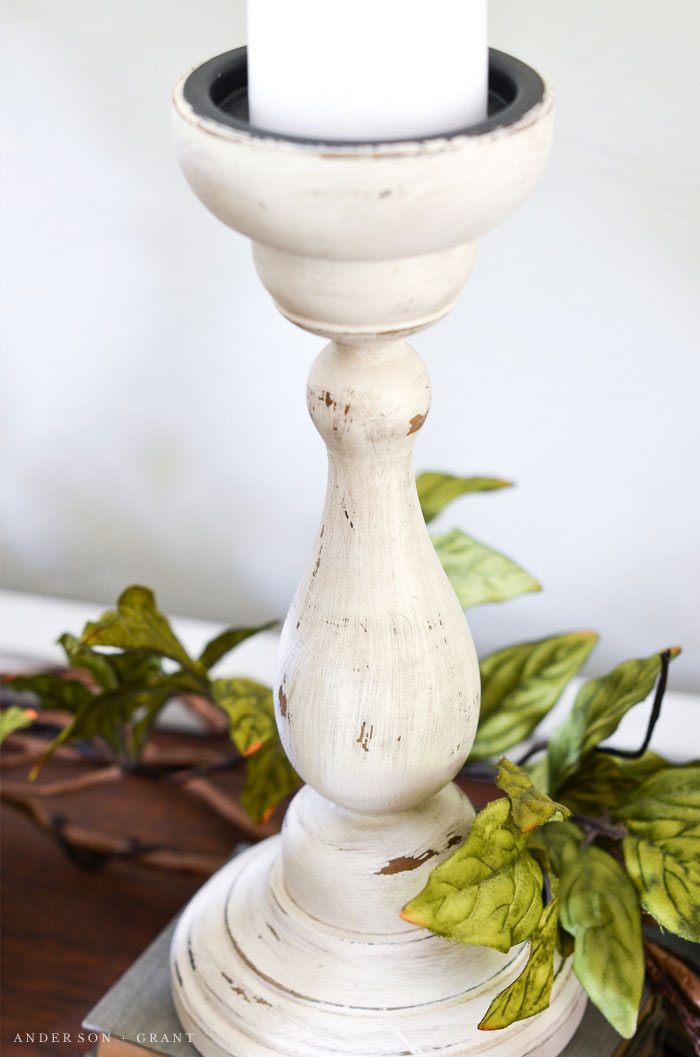
After the paint was dry, I rubbed different areas again with the candle wax to allow the next coat of paint to chip away while protecting the charcoal surface beneath the wax. Then I painted with three different shades of paint….Champlain (a creamy white), Algonquin (a dark taupe), and Stirling (a light gray). Each candlestick took two coats of color.

When they were dry, I took Casement (a clean white color) and dry brushed a little white over each candlestick. You don’t want very much paint on your brush when you do this. You’re not actually painting the candlestick but rather just highlighting. Lightly touch the surface with your brush.

Each candlestick was then sanded to reveal the charcoal color or bare wood beneath the painted surface in different areas. Because I wanted a heavily distressed and worn look, I used a heavy grit sandpaper. Use a fine grit sandpaper if you are just trying to remove a little paint from the edges.
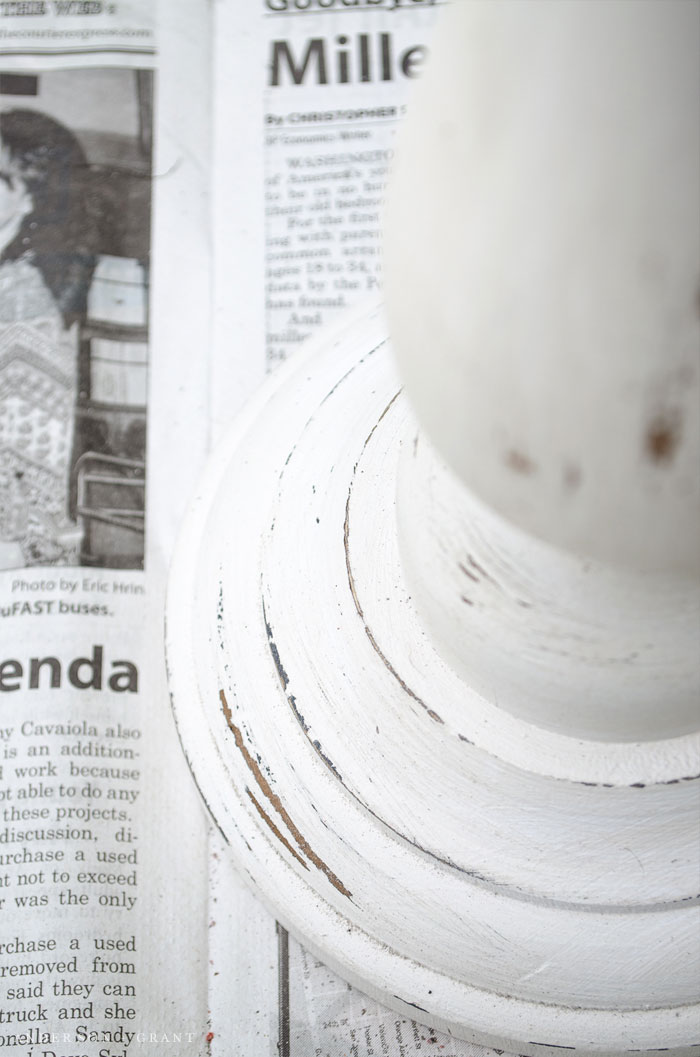
As the final rustic touch, I used Miss Mustard Seed’s antiquing wax over the painted surface to give the candlesticks some patina. You may wish for a cleaner look and could just skip this step.
You can see in the picture below the difference that the wax can make. Both candlesticks were originally painted the same color. The wax also enhances the distressing that I did with the heavy grit sandpaper.
All in all, I couldn’t be happier with how these candlesticks turned out. I hope Joanna would be proud. And while they look fabulous as a collection, a single one somewhere could look just as nice. To give a little more variation to the height of your candlesticks, use some vintage books as risers underneath.

Whether you are able to find a random bunch of candlesticks from a thrift store or you buy a matching set as I did, I hope that you’ve been inspired to use a little paint to easily transform them into something worthy of a Fixer Upper style home.

Jamie Hoover | anderson + grant

Great before and after! Love a thrifty redo and this one is great 🙂
They look great!
Love the look. Great project!!!!
I also love Fusion Mineral Paint, and use the same colours with the exception of Algonquin which I’m going to try next time
Gorgeous! Have some candle sticks just waiting for me to do this.
Fantastic find. I love what you did to them, they look lovely. Wow!
Love it! They all turned out great! I bought a few candlesticks recently to do the same project! Thanks for sharing!
I always see oodles of candlesticks at thrift stores and have frequently seen them repainted on Pinterest, but these are the nicest ones I’ve seen! I love the paint colors you used and that you did the perfect amount of distressing. Too often, people over-do the sanding, but yours is just right! I’m sitting here this morning putzing on my computer trying to find something interesting to do. They’re nice for gifts, too! I think I’m going to take a quick trip to the thrift store and copy YOU! Thanks.
Sarah…May you CANDLE STICK giving be BRIGHT!!! So happy you enjoyed the tutorial! Here’s wishing you and yours an amazing Holiday Season! Hugs!
Did you paint each candlestick with the 3 colors or each candlestick with one color after the charcoal color?
How to you decide where to rub with the candle? I’m at a loss with that one.