
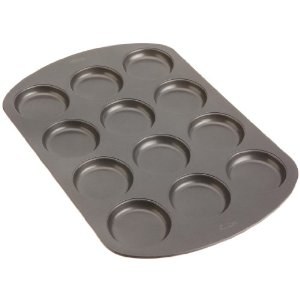
Trust me your family will love you for making these yummy treats for them! I broke my new whoopie pie tins in and I have to tell you that I truly do love them. The cakes are exact every time and the clean up is a breeze. Also, in the future I am going to make mini layer cakes, so these tins are going to serve many purposes which makes it even more special. If you plan on making a lot of Whoopie Pies, I strongly suggest picking up at least two of these cuties. If you have kids, get these for sure, they are perfect for a party, class party, birthday, or a fabulous treat for your kids to say “I Love You”!!!!! Of course you can do the drop spoon method or the pastry bag piping method which is just wonderful also : ) I was just in the mood to try something new so I treated myself to these tins and I am glad that I did!
This batch of Whoopie Pies were made from a great recipe from a sensational book Whoopie Pies by Sarah Billingsley and Amy Treadwell. It is really a great baking book because there are so many options…mix and matches…so many possibilities and so much fun! A vanilla base was voted on (not my vote but no one ever said that one counted : ) and as a filling a malted butter cream. I have to tell you, the recipes were spot on and I would not change ONE thing and that doesn’t happen often : )

Whoopie Pie Directions
Ingredients:
2 1/4 cups of all-purpose flour
1 1/2 teaspoons baking powder
1/2 teaspoon sat
4 tablespoons vegetable shortening
1/2 cup granulated sugar
1/2 cup (packed) light brown sugar
2 large eggs
1/2 cup buttermilk
2 tablespoons milk
1 teaspoon baking soda
1 teaspoon white vinegar
1 teaspoon vanilla extract
Directions: Position a rack in the center of the oven and preheat the oven to 375 degrees F. Line two baking sheets with parchment paper, if using the Whoopie pan, lightly butter and lightly flour (you don’t have to, but I am of the thought process you are always better safe than sorry).
Sift together the flour, baking powder, and salt onto a sheet of waxed or parchment paper. This makes life so easy when it comes time to add the flour to the mixture and no extra dish to wash.
In the work bowl of a stand mixer fitted with the paddle attachment, beat together the butter, shortening and both sugars until light and creamy (about 3 minutes). Add the eggs and the buttermilk and beat until combined (about 1 minutes)
In a measuring cup, combine the milk, baking soda and vinegar. (use at least a cup size because this mixture will bubble and pop up and I don’t want you to loose any) Add the milk mixture to the batter along with the flour mixture and beat on low until just combined. Add the vanilla and beat on medium for about 2 minutes until completely combined.
Using a spoon, drop about 1 tablespoon of batter onto one of the prepared baking sheets and repeat, spacing them at least 2 inches apart. If you are using the Whoopie Pie Pan, add your mixture to the center and just lightly spread. Bake one sheet at a time for about 10 minutes each or until the cakes begin to brown. I checked mine at 8 minutes and it needed just 1 more minute and out they came. Remove from the oven and let the cakes cool on the sheet for about 5 minutes before transferring them to a cooling rack and then cool completely. Now it is time for the filling…

Malted Buttercream
Ingredients:
4 tablespoons unsalted butter, at room temperature
1 3/4 cups of confectioners sugar
4 tablespoons Ovaltine powder
3 tablespoons heavy cream
1/2 teaspoon vanilla extract
Directions:
In the work bowl of a stand mixer fitted with the paddle attachment, beat together the butter and sugar on low speed until combined. Add the Ovaltine powder, heavy cream and vanilla and beat until smooth (about 3 minutes)
Note: You can use malted milk powder in place of the Ovaltine in this recipe.
This combination is FUN, a little bit different for the parents but not too different for the kids. A yummy treat for sure! I have a confession to make though…I use salted butter : ) After these delicious treats are made, sprinkle with some sifted powder sugar and serve on a pretty plate! ENJOY!


These whoopie pies look yummy! Ovaltine, huh? Been a long time since I had any of that in my house. I know the hubby would love to eat the whole plate of these! Great and yummy project!
My mouth is absolutely WATERING! Wonderful photos and thank you so much for sharing the recipe!
These look amazing! I’m drooling! Wish I could just grab one off my computer screen!
Ok, so clearly you want me to be chubby. It’s not my fault, it is Andrea’s. This will be my mantra from here on in.
You rock girl!!!!!!
Big hugs,
Julie
You had me at that first photo. Yum!!! I’ve been cruising your blog. Thanks for visiting me, and following. Following you back.
I’ve never made Whoopie Pies before and yours look so yummy I may just have to give them a try. Thanks for sharing the recipe!
xo
jeanne
Andrea, I just saw this mouth watering post!!! This sounds delicious and looks gorgeous! I am posting this to my Pinterest “pretty cookies” board. Lovely, Lovely!! xo Jina
These look SO yummy and just perfectly beautiful! Thanks so much for sharing them with us! Hope you had a wonderful Christmas!
These look AH-MAZING! (And your photos are stunning)!
What a great presentation! The pan makes it look so easy to make these yummy treats. I am pinning this post. I am a new follower visiting from Sew Crafty Tuesday. Vicky from Mess For Less
NUMMY NUMMY NUMMY!!!! These look so VERY Tasty… Thanks for sharing these at http://shoprubyjean.com/2012/01/sew-crafty-tuesday-5-and-jo-totes-winner/
Wooo Hoooo to your Whoopie Pies!!! They look so yummy!!!
New follower – saw your sweets at The SweetTalk Shop link party – so glad I stopped by!
Cheers to you & yours – Mary (SweetLittleBluebird.com)
Oh my gosh, I love whoopie pies so much, I’d knock over an old lady to get one. K-ster doesn’t like them (what is WRONG with him???) so if I made them, I’d get them all to myself and then I’d weight 400 pounds, so I will just have to look at and drool.