This Quick and Easy DIY Dollar Store Farmhouse Art is the second project in our DIY Dollar Store Farmhouse Series! This project will be done in a SNAP so hope you enjoy!
Hi there friends, how are you? Well, you all seemed to enjoy last weeks project… so the series will continue as long as you enjoy them! I have to tell you that some times a non-Farmhouse project will slip in there : ) This week we have a fun and super quick and easy project for you. If there is one thing people are always looking for for their Farmhouse Decor is Art. Either for a vignette… a gallery wall and everything in between. So… I spotted seed packets at the Dollar Store and they were 5 for $1 and I thought… they are cool… so Farmhouse and it would be easy to turn them into art. Then I thought… will this project be TOO EASY? Well I decided to share it with you and I hope you enjoy it! So come and join me with this simple straight forward tutorial. Hopefully videos will be back on the agenda SOON!!! Let’s get started.
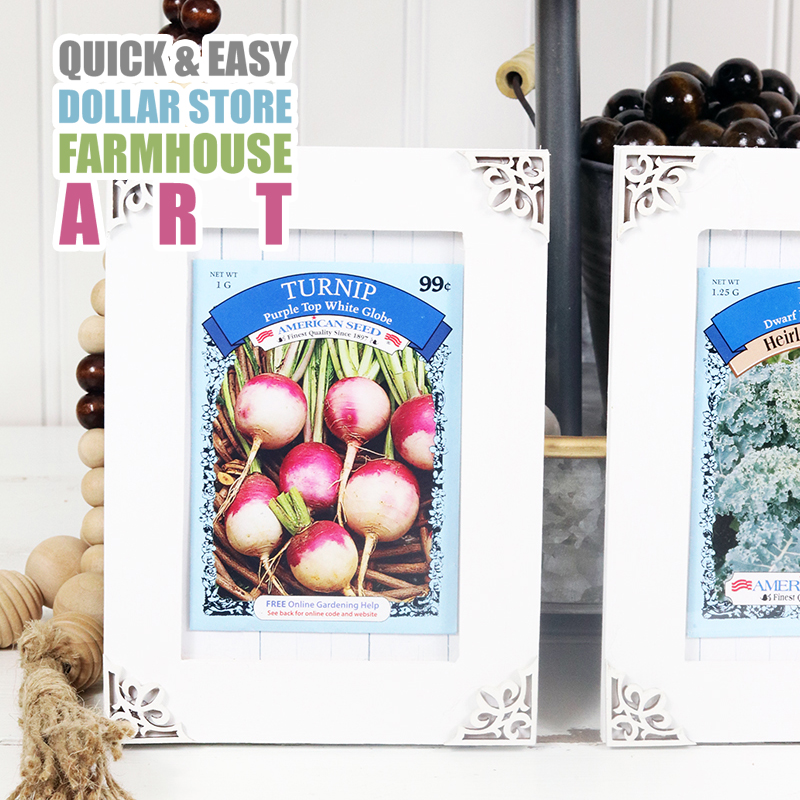
Let’s start with the supplies. You will need your Dollar Store Seed Packets… so many yummy veggies to choose from! Then some simple supplies… glue gun and stick … small foam brush… some tape… paint (color of your choice) small frames from the Dollar Store or in this case I used some from IKEA (a pack of three for $1.99) and since I had them I used them. The Dollar Store has tons of them that you can use. Then I picked up some cute corners at Michael’s… of course you can use them or not… totally your choice.

Simply paint your frame and the corners in the color of your choice and allow it to dry completely. I love using chalk paint but the choice is totally yours!

If you are using the corners it is time to simple glue them!

Now that your frame is ready (how quick was that) it is time to print out a sheet of distressed wood paper on card stock (yes… the free printable paper is waiting for you at the bottom of the post… just click on it… the image will appear… “save as” and then print!) Trace the size you need to drop into the back of your frame and cut.

Once you cut the size you need…

Take a piece of double sided tape or you can just roll a slice in a loop and place in the middle of the paper. Then carefully center your seed pack. Then assemble the frame… glass… seed pack on board… backing and VOILA!!! That’s it… you are done!

Ready to Hang!

Or lean : )


Free Printable Frame Background
Sure hope you enjoyed this little tutorial. You asked for quick and easy and I think that’s what this DIY was lol!!! You can also score some pretty flower seeds in the Spring which would work perfectly for this project. Just think of all the possibilities!!! If there is something you would like to see here… please let me know ok!
Stay Up to Date with The Cottage Market by Joining our Mailing List!
Check Out the Rest of our Free Printables Here!
So…Fire up those printers and I highly recommend if you are going to print from home to use a high quality card stock…it’s the best quality!
Remember…you can resize these for any purpose you have in mind. I always have to share that your local office supply store can print amazing lazer copies for you on card stock for under $1!!! Hope you ENJOY!
If you are looking for MORE FREE Printables…Personal Planners… Food Planners, Diet Planner… Party Banners…Graphics…Recipe Cards…Digital Scrapbooking Paper Packs check out our Freebies Gallery!
| Want to stay in the know? I’d really love that! (((HUGS))) |
| Like … on Facebook | Follow … on Pinterest | Follow … on Instagram | |
 |

Quick and Easy DIY Dollar Store Farmhouse Art
Written by: Andrea Cammarata

Leave a Reply