I know…it’s negative 2 degrees this morning and I am talking about ice cream! Couldn’t help it…I had an idea about a semi-homemade cannoli ice cream and just had to make it to share with you and I needed a stand to display it in the style it deserved! It turned out just the way I envisioned (don’t you love when a plan comes together) so sharing it with you was a must! You can make this any size you want…how awesome would it look at a party…picnic or any fun time. So you can tuck this away for a warmer day…but remember…it’s going to be much warmer this weekend and ice cream is always a good thing…you need to check out the semi-homemade cannoli ice cream recipe…it will become a family favorite! Let me show you how to make this vintage style project…it’s quick and easy!

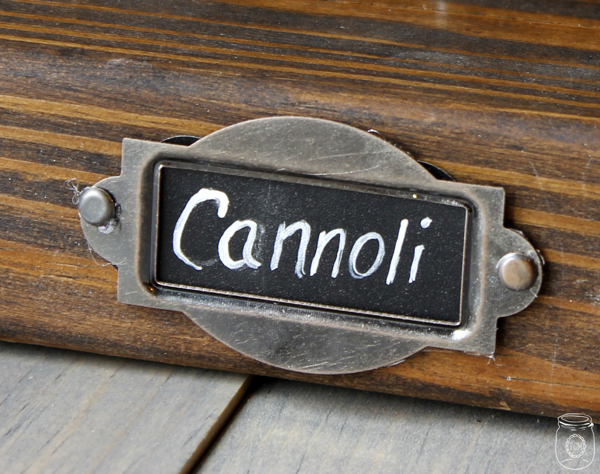
All you will need is a 2X4 cut to any width you would like…3 cones fit perfectly on a 10 inch wide piece so you can do the math from there! You will need a drill & 16 gauge wire. You can choose to use paint or the stain of your choice. For the front I used little metal labels that I picked up at Michael’s or another fun thing to do is to paint the front with chalkboard paint or apply a chalkboard label to fit the front.
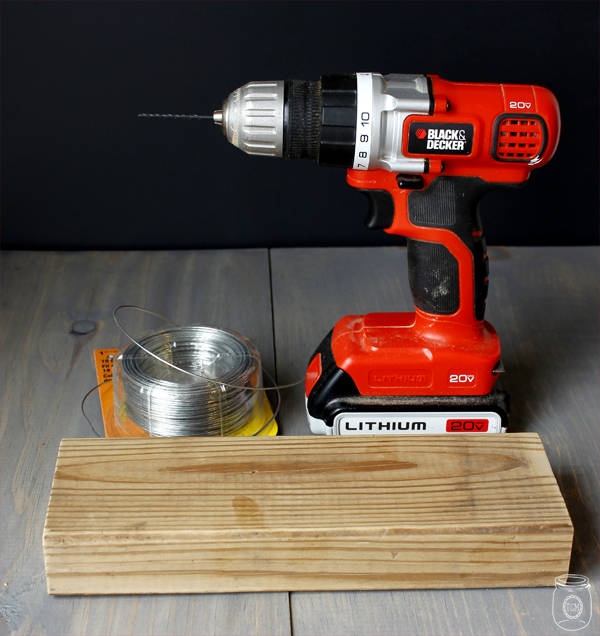
Sand…then Stain or paint your block of wood …measure the placement of the holes according to what size you choose to make.

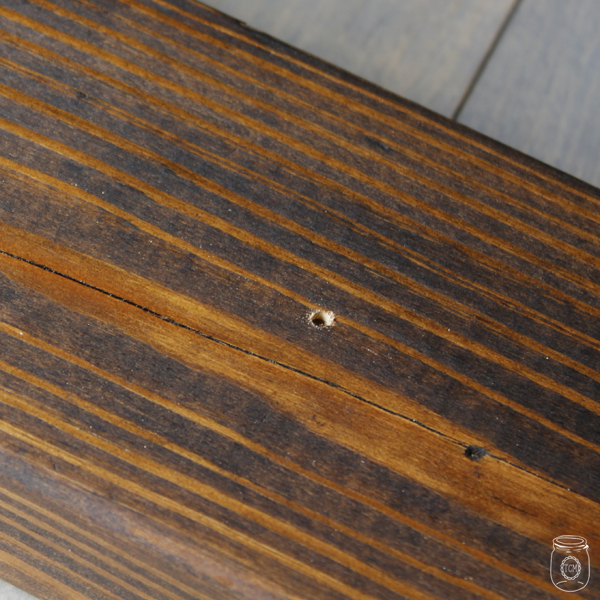
Drill as deep as you can without going through…but if you go through…no big deal!
Now is the time to apply your mental label holders or paint the front with chalkboard or chalkboard label…or you can also leave it plain. Slide in your flavor and viola! Feeling artistic…maybe you would like to create a design…personalize it with a name…use fun embellishments…you get the picture!
I used a hard sugar cone as my guide for the coils. Simply wrapping around the cone to form the shape and leaving a good 2 inches at the end that will fit in the hole. One thing that I would do differently is to add one more wrap around for extra protection.
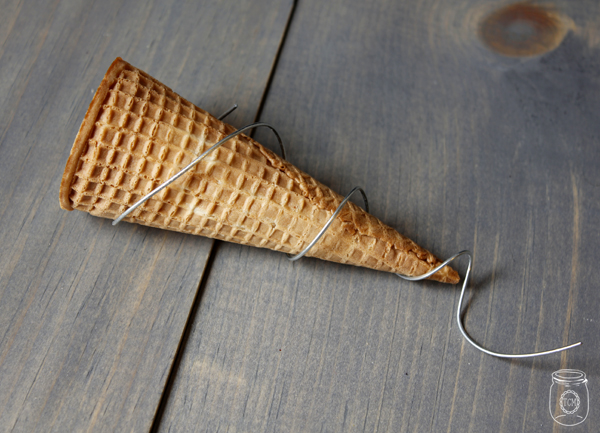
Make as many as you need for your project.
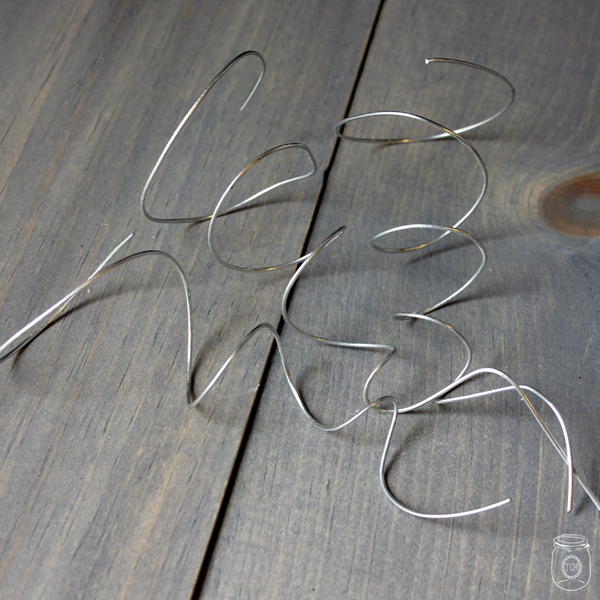
Time to assemble. This requires some playing around with the wire. First you need to apply either a coat of hot glue to the 2 inch end piece that has now been straightened (if you use hot glue you need to work fast) or a good strong glue of your choice…put a coil in each hole and let it dry. Then bend and arrange the coils till they are just the way you want them and straight! Each coil will be a little bit different than the other but that gives it charm. Guess what you are almost done…

now all you have to add is the ice cream!!! Hop over and the the recipe…easy and delicious!

Hope you have tons of fun making your Vintage Style Restoration Hardware Inspired Ice Cream Stand. Like I always say…make it with your own flavor…the possibilities are endless and I know you have a million and one ideas! Maybe this could be the centerpiece at the next birthday party. As I am sitting here looking at it…you know what would be cool? If you place empty cones in the coils and then add flowers! What a cool and fun centerpiece. You could use those little florist vials for holding the water…or maybe slide a tiny clay pot with a succulent in it…again…tons of possibilities and I do believe it will be very unique! ENJOY!
(((((HUGS)))))

Super cute Andrea!
Thank you my friend! Glad you like it…I sooooo respect your opinion…you are a master!!! : ) hugs…
Love it Andrea! You could use a rusty bed spring too ! Great idea!
So glad you love it Susan! Yep…you could use a spring…but I was not fortunate enough to happen upon one…so …made my own : ) LOL!!!! It would look awesome though…that was my original thought…maybe I will find some…hope so…then I will revise to share : ) hugs and have a fabulous day!!!
HOW COOL IS THIS?????? Even though I am freezing, i am SO ready for an ice cream with this project!!!!!!
Wow looks amazing ! May I ask what stain did you use. Love that aged wood colour